33 Acrylic Painting Exercises for Beginners (Explained!)
Have you been trying to begin your acrylic painting journey but are unsure where to start? Exercises in acrylic painting can be enjoyable and rewarding.
Discover how to create a watercolor imitation and even give the abstract painting a shot.
From color mixing to brush techniques, these exercises cover many strategies to help you become a more confident painter.
Regardless of whether you're an absolute beginner or have some expertise with acrylics, acrylic painting exercises are a terrific approach to establishing your foundation and creating your distinctive style.
They will give you a systematic approach to honing your skills without getting stressed or overwhelmed.
So, if you're ready to delve into the world of acrylic painting techniques, grab your brushes and join us as we explore 20 acrylic painting activities for beginners.
1. Dry brushing techniques

In essence, dry brushing is the use of a dry brush to add paint to an already dry canvas. Because the paint won't mix in with all the layers you currently have underneath, adding distinctive shapes or layers is simpler.
You can use this light, dry-brushed layer to paint anything beautiful with just a touch of grit, including plants, soil, sand, pebbles, other natural objects, and rough-textured items like jeans and TV static.
It is a straightforward method. You can load the brush with a lot of paint or a tiny bit to produce opaque lines and hues.
Before painting, experiment with different brushes. For a more uneven coverage, it is recommended to use older brushes.
2. Watercolor imitation

Acrylic paint is both water-based and water-soluble. Since acrylic paint is generally extremely thick and heavy, several approaches involve adding water to the paint. It should have roughly 50% water for a washing effect.
Backgrounds often use acrylic paint washes as a backdrop.
Remember that acrylics are extremely fast-drying, mainly when applied in thin layers, and you cannot open them after they dry - they become water-resistant.
This is true even if you dilute acrylic paint and use it as watercolor. Acrylic, which mimics watercolor, is less forgiving.
Since water may impact the overall quality of the paint on a watercolor paper and its longevity, you can use other substances to thin acrylic paints.
But you can also thin acrylics using other techniques, such as mediums.
Read also: 17 Proven Painting Exercises for Beginners (Practical Tips).
3. Stippling acrylic painting technique

Using a sponge or a brush with stiff bristles, this acrylic painting technique subtly accumulates color. For this style of painting, almost any stiff brush will do.
By varying the colors' intensity, the technique will enable you to create stunning color gradations. Surfaces created with this method look fantastic with foliage or backgrounds.
Use medium, light, and darker colors to create depth when stippling.
4. Hatching technique
Hatching is an acrylic painting technique similar to stippling, but instead of using dots, it uses lines. This is how to go about it:
- Grab a little sable brush
- Use translucent or opaque fine paint that is darker than the underside of your artwork
- Draw lines forcefully and with confidence. You should use even brush strokes when painting. They may be long or short, thin or wide.
- Apply the first color, allow it to dry, and then blend in the second.
Carefulness and precision are essential for delicate hatching with acrylic paint.
5. Splatter painting

Splattering, also known as flicking, is a simple and fun way of painting. This method is more frequently used in abstract art, especially when fascinating effects and details are desired. It is also frequently used to paint freckles or stars.
Here is how to do it:
- Apply diluted paint to your brush.
- Then, set it above your painting.
- Tap the handle, flick the brush, or pluck the bristles to create a spatter.
Avoid overdoing it; it can turn messy and less artistic. Also, remember that you must completely protect the floor or surface you paint on while using this technique because splatters can occur anywhere!
6. Wet-on-wet blending
Wet on wet is a fundamental watercolor technique and a blending method for some acrylic, oil paintings, and gouache paintings. The wet-on-wet technique is uncommon since acrylics dry quickly.
You apply the first color first, then, while it's still wet (acrylics stay wet for 10–20 minutes), quickly apply the second color to make a gradient.
You can mist the paint with water to slow the drying process. Ensure you let your paint dry completely because uneven drying might cause cracking.
7. Detailing technique

Detailing is the process of adding small, intricate details to a painting using a brush. The final result is worth the time, effort, and attention to detail necessary to learn this method.
The correct detail brush is essential for this method; for acrylic paint, utilize synthetic brushes. If you want to purchase brushes separately, look for liners, detail brushes, and riggers.
If you want to paint fine details, it's important to either dilute acrylic paint to an inky consistency or use acrylic ink. This will ensure the paint is uniform, fluid, and easy to control.
Here are some helpful tips for acrylic detailing:
- Use a delicate touch when applying paint.
- Before adding any details, let the painting dry. Add details last.
- Use an easel if it is more comfortable for you to do so, or lay your work out flat.
- Keep a paper towel on hand to quickly fix errors.
Get this 10 Pcs high-quality paint brush set. It is ideal for different painting techniques, including acrylic painting.
8. Dabbing

Another fascinating and simple method is dabbing. You'll need a sponge or a towel dipped in paint. Simply loading paint and dabbing the surface is the entirety of the process.
Use dabbing to paint backgrounds or to dab shapes using stencils.
Depending on how much paint you use each time, it can be smooth or have texture.
9. Wet brush on a dry canvas
Traditional painting involves wetting the brush before applying it to a dry surface. Moisten the brush in a water-filled jar before applying paint.
Additionally, you can add water to the paint to thin it out and give it a uniform consistency before layering it on the canvas.
10. Painting with a palette knife

Palette knives are often used as an impasto technique in abstract, portrait, and landscape painting. Although you can blend colors using a palette knife, painting with them is far more enjoyable.
Apply paint directly to the surface, shaping it using a palette knife to provide interesting texture and thick layers. You can also use it to draw lines with the knife's edge, scratch paint, or spread paint out smoothly like frosting.
While using a palette knife to paint an abstract picture is quite simple, you might need some time and practice.
11. Impasto painting
The impasto method requires heavy body paint or additional gel mediums for dense, textured, original paintings with dimension. You'll need modeling paste and a palette knife to work with this technique.
Creating textures may require more open time than conventional acrylic paint can provide, as this technique illustrates. Use retarders in this situation.
When using the impasto technique, avoid using water.
Once a basic impasto layer has fully dried, you can glaze or paint over it.
12. Stenciling
Stenciling involves using stencils, which you can buy or make from paper or other materials (and reuse). Although it won't be ideal, you can cut some cardboard or tape to form the necessary shapes.
You can do the following:
- Using stenciling, color a specific area
- Utilize a variety of stencils in layers
- Make a painting inside it using a stencil.
You can color the areas without using fluid paint by using soft body paint, brushes, sponges, or spraying.
13. Flat color technique

The term "flat color technique" refers to creating even, solid, unbroken, and entirely uniform brush strokes and areas of color intensity. Usually, the edges are sharp.
It is perfect for painting tutorials, abstract art, and backdrops (if they fit your idea).
To work with flat colors, you need a good brush, mastery of brush technique, and opaque, high-quality paint.
Avoid over-thinning paint for this approach, and if your paint isn't opaque enough, try mixing it with colors that are.
If that doesn't work, try other techniques to make acrylic paint more opaque.
14. Paint with a family of tones

This can serve as the inspiration for the entire painting:
Select the main, primary tone, blend several tones using, for example, Titanium white, and then use only this palette of colors to paint.
Flowers create hues, depth, complexity, and a delicate touch that works exceptionally well.
The same applies to the scenery. It takes a lot of time to prepare, create swatches, practice (so you know exactly how much to mix), and patience to use this approach.
15. Paint in blocks of color
Blocking is merely one of the steps in conventional painting; it divides color areas into those corresponding to light and shadow areas. Additionally, it gets your artwork ready for adding details.
For instance, you can use three color blocks while painting a lemon: bright yellow, medium yellow, and almost red-yellow-orange.
Modern artists frequently use blocking as a style within itself without adding any further detailing.
You may also like: 7 Drawing Exercises To Pass The Time
16. Layering

The most fundamental and essential acrylic painting-building technique is layering. It simply means applying paint in thin layers and letting it dry in between.
You can transition from backdrop to detail and dark to light colors using layers.
It requires focus, patience, and time, though not as much as oil paints because acrylics dry quickly.
17. Under-painting
The underpainting approach is rooted in a long-standing academic tradition; it requires you to create a sketch, or underpainting, for your upcoming painting.
Some artists use brownish tones, though typically, you can produce an underpainting with a primary hue that contrasts with the entire piece.
When painting, you typically cover the underpainting or use it as highlights or a shade.
18. Brushstrokes
Although most artists prefer to hide them, expressive brush strokes are a whole technique. This method uses thick, obvious, buttery brush strokes to add volume, texture, and depth to oil painting.
A decent brush is essential for this approach to work.
19. Sgraffito
Sgraffito, which means "to scratch" in Italian, is a painting style that incorporates scratching.
This approach provides an intriguing effect: when you paint abstractly or with hairs, trees, or water, you can see the layer below through scratches in the top layer.
This is how to employ the Scgraffito method:
- Apply the layer that will show through scuffs, then wait for it to dry.
- While the top layer is still wet (up to 30 minutes; if you need more, use extenders or other slow-drying techniques), apply the top layer and scratch it.
You can use any tool you have on hand, silicone or rubber-specific tools, and paint shapers to scratch.
20. Glazing

Glazing is the process of adding glaze layers. A glaze is a light, translucent paint coating. You cannot use glaze alone; glazing is a series of multiple layers that add depth and change colors.
Place each glaze liquid after the previous one has dried to prevent the glazes from blending.
As a result, the outcome is distinct from blending two hues.
Do the following:
- Apply a foundational color
- Apply several glazes
- Enjoy!
Before use, you should thin acrylic paint because this technique requires glazing liquid and translucent layers. Use specific thinners or water.
This method is difficult because it calls for a glazing medium. You also need to be familiar with color theory and a color wheel to comprehend how colors might interact.
21. Painting with fingers

Finger painting is the simplest and "cheapest" technique because all you need are your fingers. It may be enjoyable for people of all ages. The palm and fingers have interesting textures and patterns.
With fingers, blending is incredibly simple and seamless. You can make dots and lines, combine fingers, use many colors simultaneously, and even one for each finger.
Because acrylics are difficult to remove from clothing, always have towels on hand and wear an apron when handling them.
22. Scumbling
Scumbling is a method that you can use to produce smokey effects and delicate color blending. Its major objective is to draw attention to the lower layer when the top layer is broken.
- You'll need to scrumble with white paint.
- You'll also require a dry brush or towel.
Rub small amounts of paint over a dry layer to reveal the color underlying a dry layer.
Additionally, use strong body, opaque paint instead of thinned or translucent paint for scumbling.
23. Acrylic pouring
Acrylic pouring is the latest art craze. It is a very simple, refreshing, and creative procedure. You'll need a canvas, fluid paint, floetrol, and a hair dryer to get started. Pouring acrylic can be compared to abstract painting.
The primary step in creating a dynamic pattern is pouring fluid acrylic colors onto the surface and moving it. You can also use a straw or a hairdryer to produce an effect.
24. Misting
Misting is a moist method. You paint and then mist-paint areas while they are still wet or semi-dry to make runny paint or work with the paint for longer.
Use an old spray bottle filled with water or wetting spray.
25. Q-tips
Applying acrylic paint with Q tips is fun and suitable for adults, amateurs, and kids.
You can:
- Get several Q-tips and fill them with paint to create lilac-like blooms.
- Draw using paint or markers
- Load each Q-tip with a different color
26. Dripping water
To achieve a dripping and running effect with your paint, consider adding a clear acrylic medium. You can also dilute acrylic paint with water and use a wet brush to paint a space.
Then, add a few drops of water while the acrylic paint is still wet.
They'll start creating forms that resemble dendrites right away.
27. Mix acrylic paint with sand
Two approaches can be utilized:
- Directly combine sand and acrylic colors
- You can also first make colored sand by dyeing it
28. Crackle
Usually, you would fear if an acrylic painting were to shatter, right? Cracks can, nevertheless, often be quite attractive. Crackling is the name of both the method and the media.
In the event that the foundation is excessively thick, acrylic paint will naturally break. For results that are assured, however, use a crackling medium.
29. Pumice technique
Pumice gel mediums for acrylic paint range from ultra-fine to fine. After drying, it produces a hard, coarse (or fine) layer and provides noticeable texture and volume.
Just combine it with paint and apply.
30. Use salt
Wet paint will take on intriguing patterns when you sprinkle salt on it. The effects require a water-salt reaction. Hence the paint must be moist.
For this acrylic painting method, it is preferable to use less expensive paint.
31. One-stroke exercise
When using acrylic paint, one stroke is when you load your wet brush with several colors and try to complete an aspect with only that one stroke.
The one-stroke method is a popular way to paint flowers. Try to create one layer with one stroke, if not the entire piece.
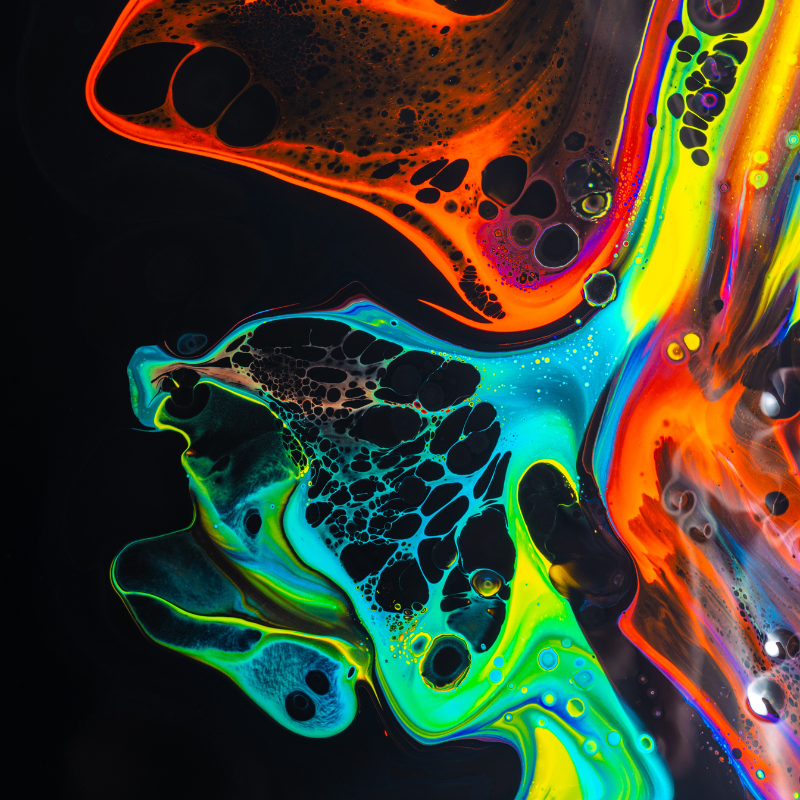
32. Psychedelic painting
Creating psychedelic acrylic paintings with pouring techniques is simple, but you can also add lines, shapes, and colors by hand.
All the colors used in psychedelic art are vivid, sharply contrasted, and possibly even fluorescent.
33. Airbrushing

Airbrushing is a sophisticated painting technique. You not only need to understand how to use the device, but you also need to purchase an airbrush and a compressor.
However, it is one of the best methods for painting models and miniatures and spraying halo effects.
Takeaway: Unleash the artist within by employing these unique acrylic painting exercises for beginners
Ready to let your creative side shine? Explore the world of acrylic painting with these exercises designed for beginners!
Each technique has given our artwork more depth and vitality, from perfecting dry brushing to exploring stippling, hatching, splatter, detailing, and scratching.
There is, however, more to discover!
Don't be afraid to explore new artistic styles and various techniques.
Buy our high-quality painting brush set to get started.