7 Acrylic Painting Techniques for Beginners (Expert Recommendations)
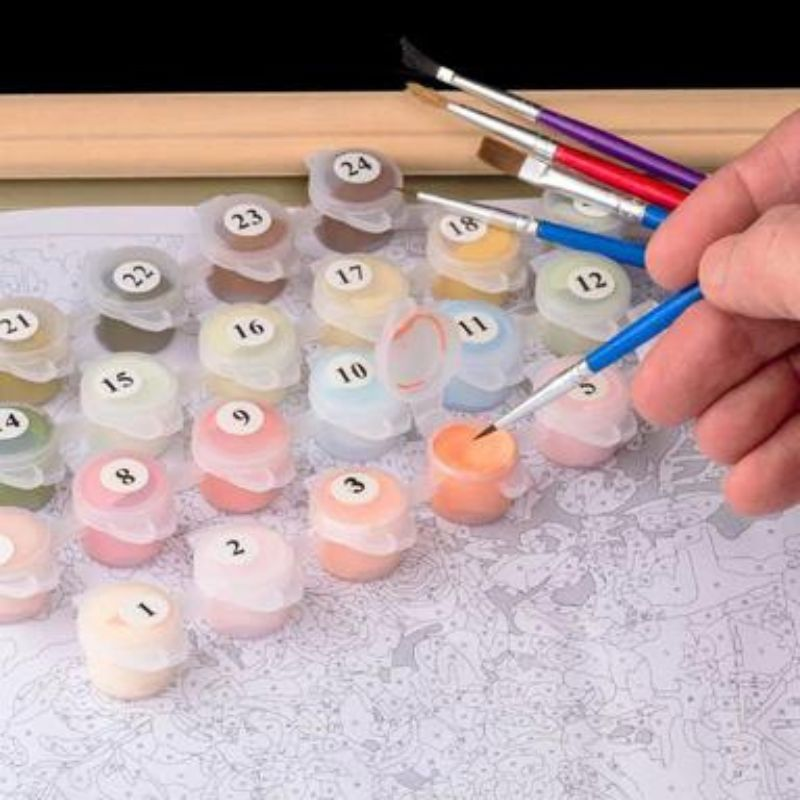
Painting is loads of fun, whether you prefer freehand or using a custom paint-by-numbers canvas.
However, if you are a beginner, choosing the right accessories, especially the paint, will contribute heavily to your overall experience. Acrylic paint is the best medium to begin your painting journey.
Unlike other paint mediums, acrylic paint dries quickly, so you don’t have to wait before moving on to the next section on your paint-by-numbers canvas.
Furthermore, you can quickly dilute acrylic paint with water to create translucent washes or apply them in thick layers for vibrant and opaque coverage.
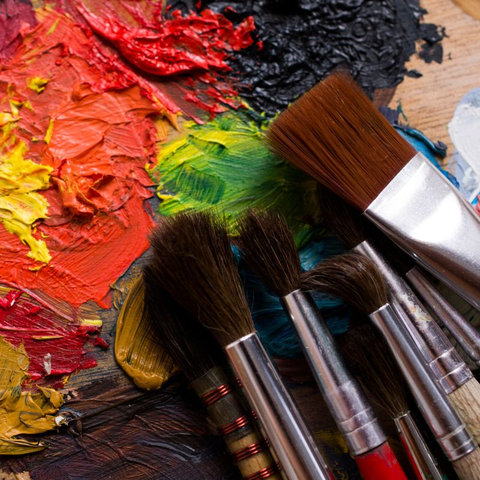
You can use several techniques to make your acrylic paintings come to life. Some of the best for beginners include blending, dry brushing, glazing, impasto, and using palette knives for texture.
Experimenting with these techniques will help you unlock a new level of creativity and artistic expression.
In this post, we will discuss in detail 7 of the best acrylic painting techniques every beginner will find helpful.
1. Glazing

Glazing is one of the most straightforward and basic acrylic painting techniques to master if you are a beginner. It adds a touch of depth to your paint-by-numbers acrylic paintings.
Glazing involves applying a thin, transparent coat of paint over a base layer that is already dry. Doing this allows the colors to interact and create stunning effects.
It transforms your flat-looking art piece into a mesmerizing ocean of interacting colors, creating beautiful light and dark hues.
So, let's dive into the world of glazing and discover how to use this technique to create your own paint-by-number masterpiece.
When to glaze?
If you don’t want your paint-by-number custom picture to look flat and uninspiring, use the glazing technique to add depth and luminosity.
Layering transparent or semi-transparent colors creates beautiful variations and subtle shifts in hue, allowing you to gradually build up the intensity of colors and greater control over the final outcome.
How to get started
Here are the things you will need to do before you can begin glazing your paint-by-numbers picture:
- Transparent or semi-transparent acrylic paint
- A palette for mixing colors
- A palette knife
- Soft brushes (preferably synthetic)
- Paper towel
- A clean, dry DIY paint-by-numbers canvas
Glazing is a process of applying thin layers of acrylic paint over an already-dried surface. Therefore, you must ensure your base coat is dry before you start layering on top of it.
If your canvas still has wet paint, you risk the colors mixing and muddying the desired effect.
How to choose colors for glazing?
Transparent or semi-transparent hues are best for glazing. These colors allow light to pass through them, creating luminosity and depth in your abstract art.
The best colors for this fantastic effect are earth tones, yellows, blues, and reds. That said, you can always experiment with other colors too.
A step-by-step guide to applying the glazing effect
Here is how you can create a beautiful glazing effect in your paint-by-number paintings:
- Mix a small amount of the desired color on your palette. Blend the paint until it reaches a smooth and even consistency. Remember, the glaze should be transparent, so you might need to add a considerable quantity of water.
- Dip a soft brush into the glaze mixture, ensuring it is evenly loaded without dripping.
- With a light touch, gently brush over the dried base layer. Allow the paint to spread naturally by keeping your strokes even and light. You will notice that the glaze initially appears quite faint, but don't worry—it will intensify as it dries.
- Allow each layer to dry completely before applying another one. Depending on the desired effect, you may need to add multiple layers to achieve your desired depth and richness.
Remember, patience is vital. Don't rush the process; give each glaze layer ample time to dry before proceeding.
Glazing with acrylic paint opens up a world of possibilities for adding depth, luminosity, and an ethereal quality to your artwork. It is a technique that rewards patience, experimentation, and a touch of creativity.
So, grab your brushes, mix up some beautiful glazes, and let the magic of glazing transform your paint-by-numbers custom picture into a mesmerizing work of art.

2. Splattering

Splattering involves flicking or dripping the acrylic paint onto the canvas to create random and expressive marks. It is a great way to inject energy, playfulness, and spontaneity into your acrylic painting.
It is also a fantastic way to add texture, movement, and a touch of whimsy to your artwork.
Let’s see what this technique entails and how you can get started with it to create your next masterpiece.
When to use splattering?
You can use it anywhere you like. That said, it works best if you want a sense of liveliness and unpredictability in your paintings. It breaks away from controlled brushwork and introduces an element of surprise.
Splatter marks add a dynamic quality and unique visual interest, making your artwork stand out.
How to get started
To embark on your splattering adventure, you will need the following:
- Acrylic paints in your desired colors
- Palette or paint tray
- A brush with stiff bristles (a stiff, flat brush works great)
- Paper towel to cover your workspace and a dry canvas, if needed
Before you begin, ensure that your painting surface is primed and ready. Work on a blank paint-with-number canvas or over an existing dry layer of acrylic paint; the choice is yours.
Just make sure the surface is prepared for the splatters to adhere correctly.
A step-by-step guide to applying the splattering effect
If you want to take your paint-by-number crafts to the next level, here is a step-by-step guide that will help you get started:
- Squeeze a small amount of each paint color you want to use onto your palette. You can mix colors or use them straight from the tub.
- Thin the paint slightly with water if needed to achieve the right consistency for splattering.
- Splattering can be messy, so creating a designated area for your splattering adventure is always a good idea.
- Take your stiff-bristled brush and dip it into the acrylic paint. Make sure the bristles are well-coated but not overly saturated.
- You can gently tap the brush against your palette or flick your wrist to remove excess paint.
- Now comes the fun part! Stand a comfortable distance from your canvas and position the brush above it.
- Use your other hand to tap or flick the brush bristles with your finger. It will release the paint in a splattering motion onto the canvas.
Experiment with different angles, distances, and motions to achieve the desired effect.
Create fine, controlled splatters or go for more wild and energetic ones for your abstract painting—it is all about exploring and finding your style.
It is also possible to use this painting technique in layers; just remember to let one layer dry before adding another.
Feel free to experiment with different brush sizes and varying amounts of paint. We also recommend suggesting trying alternative tools like a toothbrush or a paint-loaded sponge.
The possibilities are endless!

3. Palette Knife Technique

A palette knife is an excellent alternative to your paintbrush to create stunning and unique effects by applying thick, textured paint strokes.
It is a fantastic way to infuse your artwork with a touch of drama and create eye-catching details.
When to use a palette knife?
It is important to remember that, like any common acrylic painting technique, the palette knife also works best if used judiciously. The best scenario that calls for this method is when you want to achieve thick and impasto textures, create sharp edges, and layer colors.
The resulting textures add dimension, energy, and visual interest to your paintings.
Whether you want to depict rugged landscapes or abstract painting compositions or add dynamic details, the knife technique adds that extra dimension when painting pictures.
How to get started
Here are the tools you need to get started using this fun acrylic painting technique:
- Acrylic paint that comes with your custom paint-by-numbers kit
- A palette knife (experiment with different shapes and sizes)
- Your paint-by-numbers canvas
You can add texture directly to the blank dry canvas or on an existing layer of color.
A step-by-step guide to using the palette knife
While it is a simple technique, here are the basics to get you started:
- Scoop out properly diluted acrylic paint directly from the container with the knife's edge or tip. Be generous with the amount of color to create thick and pronounced textures.
- Hold the knife at a slight angle and use the edge or tip to apply the acrylic paint onto the canvas. Experiment with different strokes, directions, and pressure to achieve the desired effect.
- With this technique, it is possible to create broad strokes and fine lines or scrape the surface to reveal underlying layers.
- Build up your acrylic painting by layering different colors. Mix colors directly on the canvas with the palette knife to create beautiful blends and vibrant contrasts.
The technique allows you to create intriguing textures and details. You can use the knife's edge to carve out shapes, scrape away paint for highlights, or even add intricate patterns.
Let your imagination guide you as you explore the versatility of this fantastic tool.
You can get high-quality acrylic paints in this PaintYourNumbers kit. It has the perfect consistency for experimenting with this technique.

4. Detailing with a fine brush

A fine brush is excellent at capturing the details of the texture of a petal, delicate facial features, or other intricate patterns. The technique allows you to infuse your artwork with precision and sophistication as no other technique can.
While splattering and the palette knife acrylic painting techniques are great for adding texture, you will struggle to add intricate details with these common acrylic painting techniques.
A small precise brush, on the other hand, can add delicate strokes and meticulous details, bringing your painting to life.
When to use a fine brush?
You should use this technique whenever your acrylic painting demands precise lines and brushstrokes.
While larger brushes are great for broader strokes and blocking in Paint Your Numbers canvas areas, a fine brush provides the control and precision required for subtle textures and small details.
How to get started
Here is what you will need to get started using this acrylic painting technique:
- Your desired shades of acrylic paints
- A small-sized brush with fine bristles (such as a round brush or a liner brush)
- Water container for rinsing
- Your canvas
It is essential to have a smooth and well-prepared surface to ensure the smoothness of your brush strokes. So, clean your canvas and remove any dust on the surface before you begin.
A step-by-step guide to using the fine brush
You won’t get perfect precision with a fine brush on your very first use. However, you can quickly get quite good at it and get some fantastic paintings with practice.
Here is how to properly use this technique:
- Thin the paint slightly with water before painting with a fine brush. It allows for smoother application and helps maintain precision.
- Dip your wet brush into the paint and gently tap off any excess on the side of your palette. Avoid overloading the brush with paint. It ensures better control and avoids clump formation.
- Begin applying your fine brush strokes with a light touch. If you want to increase the thickness of the line, do it gradually. That way, you will have better control of the thickness.
- Another great tip is holding the brush close to the bristles. It gives you the leverage to carry our smoother strokes.
- Also, try to keep your hand steady and avoid unnecessary pressure or shaking. Rest your hand on support or use a mahlstick to steady it if needed.
Use your brush to add intricate details, refine edges, emphasize textures, or enhance features.
Want to experiment with this technique? Check out our high-quality paint brush set. It has ten different brushes you can use to hone your skills.

5. Dabbing

We have already seen a few popular acrylic painting techniques that add texture and depth to your paint-by-numbers canvas. However, dabbing is the simplest to execute, especially if you are a beginner.
You can use a broad brush or a sponge to implement this technique and create interesting effects on your canvas.
Whether you want to depict foliage, create a weathered surface, or add intricate details, the method infuses your paintings with texture and dimension.
When to use dabbing?
If you want to create textures but don’t want the sharp edges produced by a knife, then you should try dabbing. Use this technique if you want to create soft edges and intricate details in your paint-by-numbers paintings.
When you dab using acrylic paints, it adds depth, visual interest, and tactile quality to your artwork.
How to get started
Here is what you will need to start dabbing your canvas away:
- Acrylic paints
- A palette or paint tray to hold the color
- A stiff round or flat brush or a sponge
- Water container for rinsing
A well-prepared surface will provide a good foundation for the textured effects you create through dabbing. So, use a clean, stretched canvas to get started.
A step-by-step guide to dabbing
Here is a brief roadmap to get you started with the dabbing acrylic painting technique:
- You have the option to use a wet brush with stiff bristles to create defined textures and fine details or a sponge for a softer and more diffused effect.
- Dab a small amount of wet paint onto your chosen tool, ensuring it is evenly distributed but not overloaded.
- Press it onto the canvas avoiding smearing the paint. Instead, focus on creating distinct marks or clusters of color.
- Vary the pressure and angle to achieve different textures and effects.
Layering colors to create depth and complexity in your artwork with this technique is also a great idea.
Once you have created the desired texture or base layer, use the fine brush technique to add finer details and highlights.
Another great tip is to dab lighter or contrasting colors onto the textured surface to create depth and make certain elements pop.
Dabbing is easy to master and can create stunning results with minimal effort. Once you get enough practice, your paintings will start looking more surreal and intriguing.

6. Dry brushing
As the name suggests, the technique involves using a dry (well, almost a dry) brush to create sweeping strokes highlighting a textured canvas. The method can add shadows and depth to your artwork with minimal color.
It is an ideal technique to capture the realistic texture of fur or weathered surfaces like hills or stones.
When to use dry brushing?
It is ideal for adding subtle highlights and creating textured effects. If you wish to highlight raised surfaces, edges, and fine details selectively, this is a great technique to master.
How to get started
We recommend using a paintbrush with stiff bristles to execute the dry brush painting technique. You will also need acrylic colors that are not too thinned paint to catch just a hint of color on your brush.
A step-by-step guide to dry bushing
The technique can be a bit difficult to master, but here is a good starting point:
- Begin by dipping the tip of your brush into the color. Remember, the goal is to have a dry brush with a hint of color.
- Remove the excess if you accidentally catch too much paint by gently dabbing the brush on a paper towel or cloth.
- To apply the color, gently sweep the brush over the raised surfaces, edges, or details you wish to highlight. It will catch the texture, leaving behind traces of the pigment that enhance the details and create a sense of depth.
- Repeat the process with additional thin layers, gradually increasing the desired intensity and effect.
You can even blend the layers to soften the effect. Doing this creates a smoother transition between colors or adds a more diffused effect to the highlights.

7. Washing

Washing is an excellent method to create realistic, gentle gradients, add atmospheric effects, or infuse your acrylic painting with a delicate wash of color.
The technique allows you to bring depth and a sense of luminosity to your pictures, making them look like professional artwork.
If you water down your acrylic colors enough, they behave somewhat like watercolors. It creates a subtle shading effect impossible with thick opaque colors.
The translucent layers achieve a soft, ethereal effect that enhances the details and adds dimension to your artwork.
When to use this washing technique?
We advise beginners to use this technique for creating soft, translucent layers that add complexity to your acrylic painting. By diluting your paint with water, you can achieve a watery consistency that allows the underlying layers to show through.
The technique is perfect for adding subtle shading, blending colors, and creating atmospheric effects like mist, fog, or a hazy sky. Washing adds a beautiful sense of depth and a touch of magic to your artwork.
How to get started
You don’t need specialized tools to use this technique; your acrylic colors and water will suffice. Use any brush you like and add your thinned paint, one layer at a time.
You might notice that your canvas warps as the paint contains a lot of water. To avoid this from happening, use a properly pre-framed canvas.
A step-by-step guide to washing
The most crucial aspect of mastering washing in acrylic art is properly diluting your colors. The paint should be so dilute that it has almost a water-like consistency.
Here is how you can get started:
- Add water to thin the paint gradually and stir the mixture until you achieve the desired transparency and smoothness.
- Dip your wet brush or sponge into the thin paint, ensuring it is evenly coated but not overloaded.
- With a light touch, gently brush or dab the wash onto your painting surface. Start with a thin layer and gradually increase the desired intensity by applying additional washes.
- Experiment with different colors and layering techniques to create depth and visual interest.
- Apply washes of complementary or contrasting colors to add complexity and create visual impact. Layering washes allows for a vibrant result making your paint-by-numbers come to life.
If you are a beginner, it might help to do some painting exercises to get your juices flowing.
Read also: 17 Proven painting exercises for beginners (practical tips).

Takeaway: Unleash your creative potential with beginner-friendly acrylic painting techniques
Acrylic paints are the perfect medium to start your paint-by-numbers journey. They offer numerous advantages for beginners, making them easier to work with than watercolors or oil paints.
You can explore techniques like dabbing, splattering, and glazing with these colors, even if you don’t have much experience.
Here at PaintYourNumbers, we are all about embracing the joy of creating.
Order your custom paint-by-number kit today!
It is the perfect way to dive into the world of artistic fulfillment and self-expression.